For a direct structural face-off between ballast tub and extruded aluminum systems, see our PowerRack vs. IntegraRack Ground Mount Comparison. For smaller arrays requiring dynamic seasonal adjustment, read our hands-on Maple Leaf Goose Mount Review, and check our foundational Ground Mount Solar Panels Guide.
When designing a home solar array or off-grid homestead power system, homeowners inevitably face a fundamental crossroads: roof mount vs. ground mount. While roof-mounted arrays preserve yard space, they frequently suffer from suboptimal azimuth angles, complicated roof penetrations, micro-crack risks from foot traffic, and stringent fire-setback regulations.
Ground mounts offer pure photovoltaic freedom. They permit perfect true-south alignment, effortless seasonal tilt adjustments, zero roof leaks, and superior airflow that lowers cell operating temperatures by 8°C to 12°C—directly improving panel conversion efficiency. Crucially, ground mounts are the premier vehicle for bifacial solar panels, allowing the rear side of each module to harvest reflected sunlight from snow, gravel, or sand. Learn how ground surface preparation and mounting height affect bifacial yield in our guide to Bifacial Solar Panels Ground Mount Albedo.
However, selecting the correct ground racking hardware is a structural engineering decision. Selecting the wrong foundation or under-engineered aluminum extrusions can lead to catastrophic failure during severe windstorms or heavy winter snow loads.
In this comprehensive 2026 evaluation, GridSpecLab audits the market’s leading residential ground mount racking systems across mechanical integrity, wind/snow load engineering, foundation complexity, tilt flexibility, and total cost of ownership.
For the vast majority of off-grid and grid-tied DIY installations, the EG4 BrightMount Fixed/Adjustable Racking System takes our top recommendation. Delivering certified 130+ MPH wind survival, corrosion-resistant anodized structural aluminum, and integrated ground bonding, it accommodates 4 to 8 modern 400W–550W panels per sub-rack at under $60 per panel rack cost. For property owners dealing with bedrock, rocky soil, or zero excavation permits, the PowerField PowerRack Ballasted System provides an unmatched zero-dig ballast solution that sets up in a single afternoon.
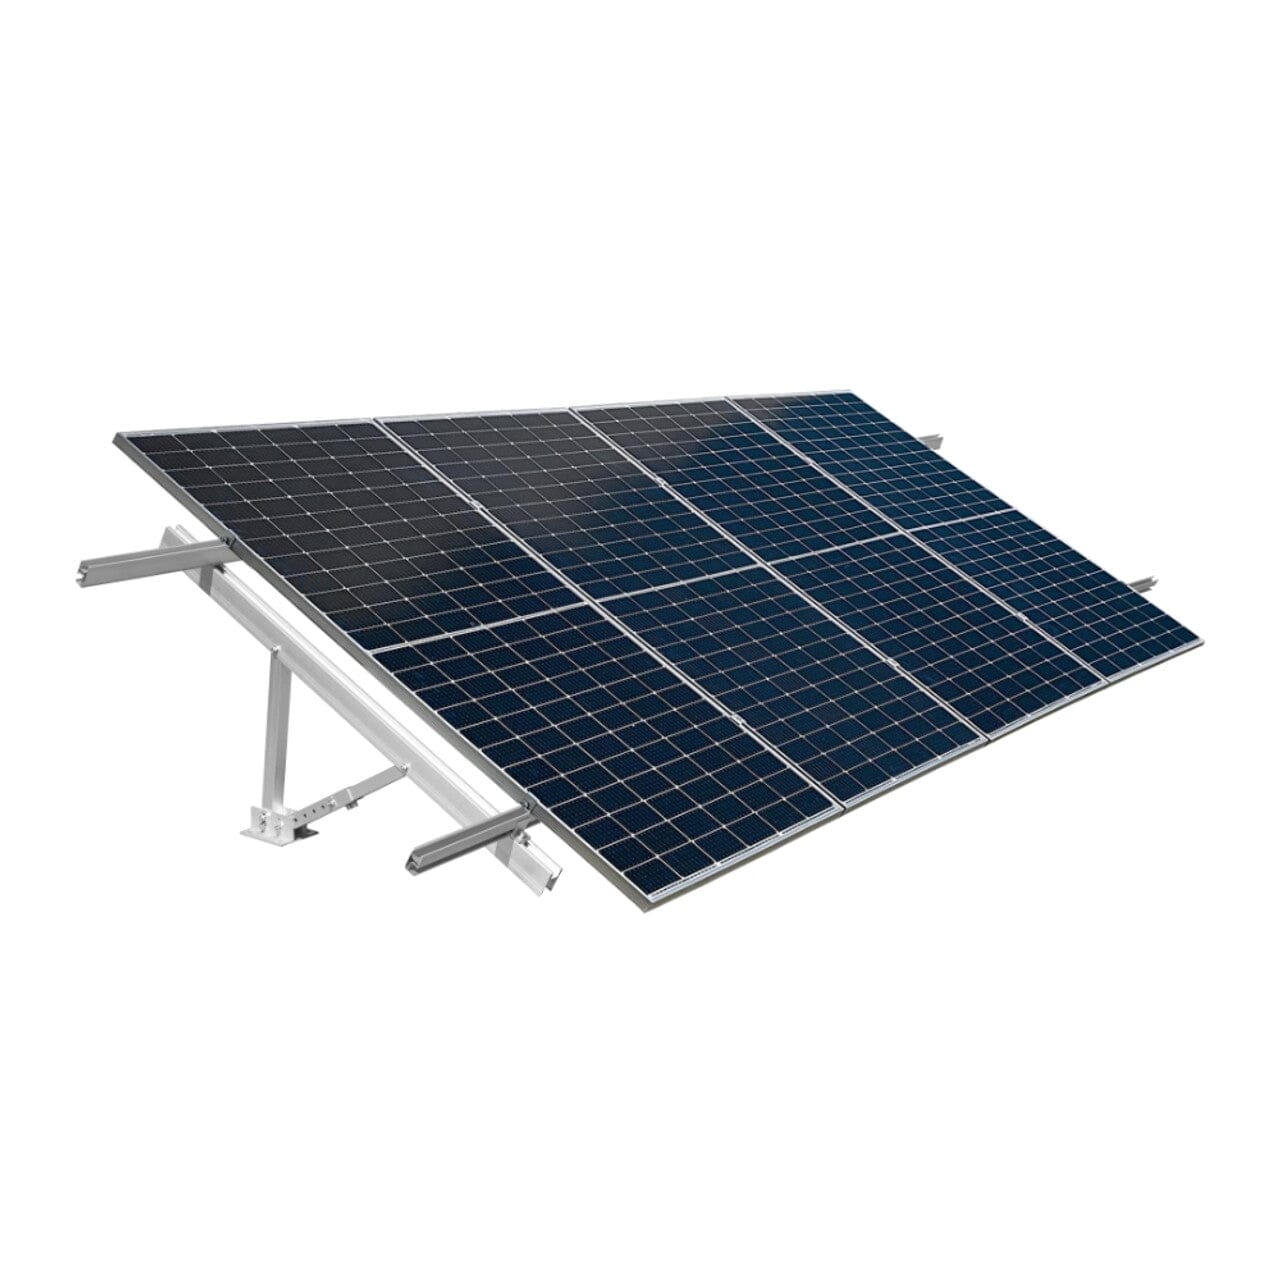
Figure 1: Ground-mounted solar arrays maximize solar irradiance harvest by enabling optimal tilt angles and unlocking bifacial rear-glass energy production.
Technical Specifications & Structural Benchmarks
A solar panel ground mount must resist two opposing atmospheric forces: downward snow/gravity loads and aerodynamic lift (wind uplift). Below is our engineering comparison of the top four ground mount systems currently available for residential and off-grid homestead deployment:
| Model Name | Panel Capacity | Foundation Type | Tilt Angle | Best For |
|---|---|---|---|---|
| EG4 BrightMount | 4 Panels (400W+) | Ground Anchors / Concrete | Fixed 30° / 45° | Fast DIY Assembly for Homesteads & Cabins |
| PowerField PowerRack | 1 Panel per Bin | Ballasted (Sand/Gravel) | Fixed 25° | Rocky Soil & Zero-Dig Installations |
| Tamarack Solar Mount | 4 to 8 Panels | Pipe in Concrete Post | Seasonal Adjust | Heavy Wind & Deep Winter Snow Loads |
| Chiko GroundFlex | 6 to 12 Panels | Ground Screws / Piers | 10° to 60° Adjust | Large Residential Off-Grid Solar Arrays |
Detailed Racking Evaluations
EG4 BrightMount Fixed / Adjustable System
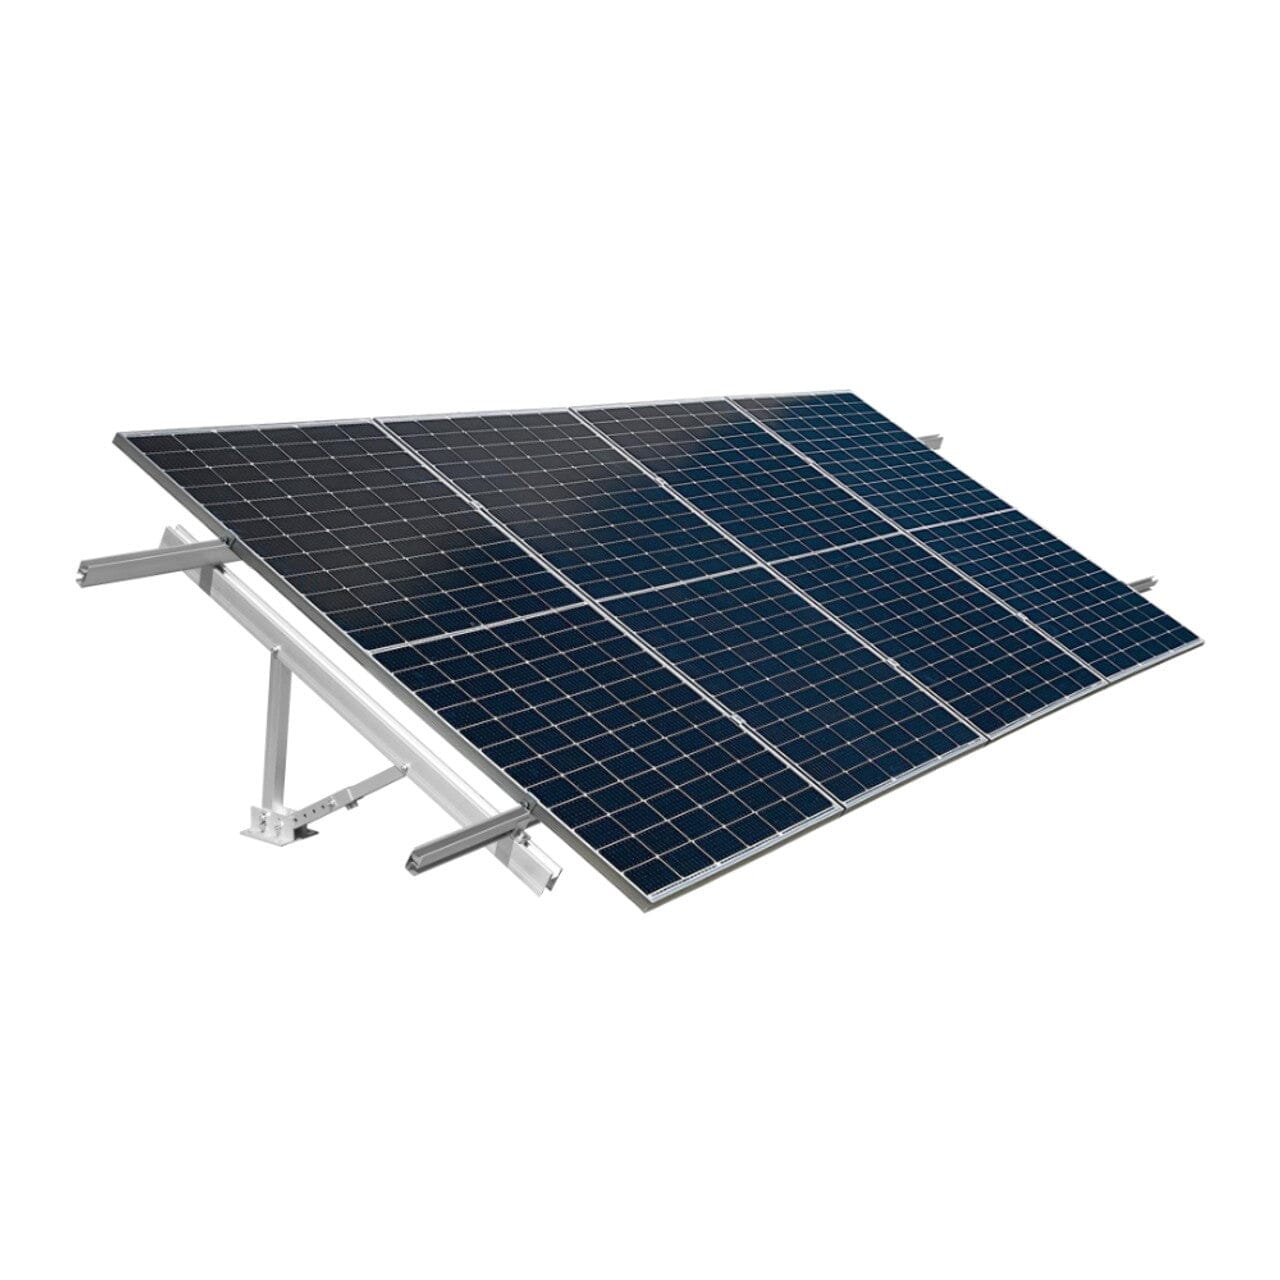
The EG4 BrightMount has emerged as the residential benchmark for DIY solar builders and off-grid homesteaders. Fabricated entirely from heavy-duty AL6005-T5 structural anodized aluminum with SUS304 stainless steel hardware, it delivers supreme corrosion resistance without the cumbersome weight and rust liabilities of raw galvanized steel tubing.
Each BrightMount sub-frame is engineered to host four standard 400W to 550W modules, and multiple units link together end-to-end with pre-machined splice kits to form continuous arrays of 8, 12, 16, or 24 panels. Integrated UL 2703 bonding clips pierce the panel anodization automatically during torquing, eliminating tedious copper wire grounding lugs across every module.
Elevating panels 28 to 42 inches above the soil, the BrightMount leaves ample clearance for airflow and delivers substantial 15% to 20% rear-side boost when paired with modern bifacial solar modules over light gravel or limestone albedo beds.
- ✓ Modular 4-panel base racks expand seamlessly to any array size
- ✓ High-strength AL6005-T5 anodized aluminum won’t rust or corrode
- ✓ Integrated UL 2703 grounding hardware streamlines electrical inspection
- ✓ Incredible cost efficiency under 75 per module hardware cost
- • Requires ground anchoring (concrete sonotube piers or heavy ground screws)
- • Manual seasonal angle adjustments require loosening hardware brackets
Ideal for: Off-grid homesteads, modular DIY arrays & high-efficiency bifacial setups
Check Price on Amazon →
PowerField PowerRack
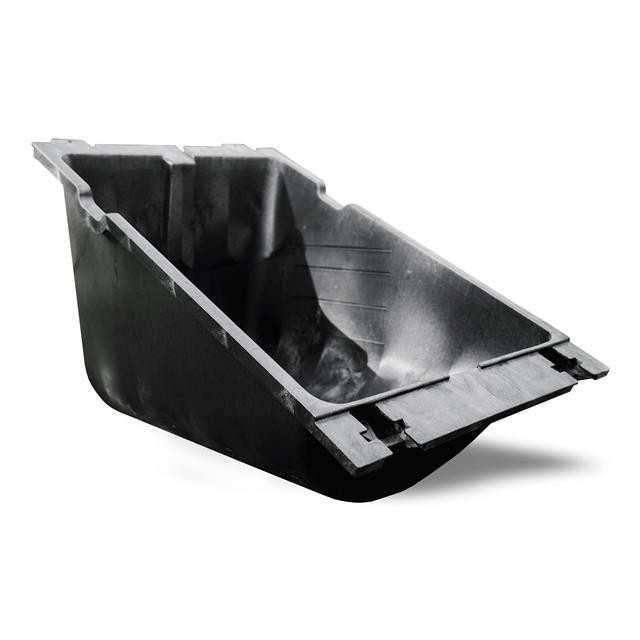
For property owners situated on shallow bedrock, granite-heavy soils, or leased acreage where excavation permits and concrete footings are prohibited, the PowerField PowerRack is an engineering breakthrough.
Constructed from thick, UV-stabilized high-density polyethylene (HDPE), each individual PowerRack tub sits directly on leveled ground. Once in position, the basin is filled with 300 to 350 lbs of standard washed pea gravel or clean sand. The solar panel clamps directly onto the molded top flanges with stainless hardware at an aerodynamically contoured 25° tilt.
Because the ballast weight anchors the assembly, a 16-panel ground array can be positioned, ballasted, and wired in under 4 hours without heavy machinery, post-hole augers, or concrete curing delays.
- ✓ 100% zero excavation: no post holes, no concrete pouring, no curing wait
- ✓ Impervious to corrosive chemicals, acidic soil, and salt spray
- ✓ Assembles in a single afternoon using locally sourced pea gravel
- ✓ Completely portable: can be emptied and relocated if moving property
- • Lower bottom clearance (14 inches) limits rear bifacial albedo gain
- • Fixed 25° tilt cannot be steepened for extreme northern winter snow shedding
Ideal for: Rocky terrain, bedrock, rental land & fast single-day installations
Check Price on Amazon →
Tamarack Solar Pipe-Mount
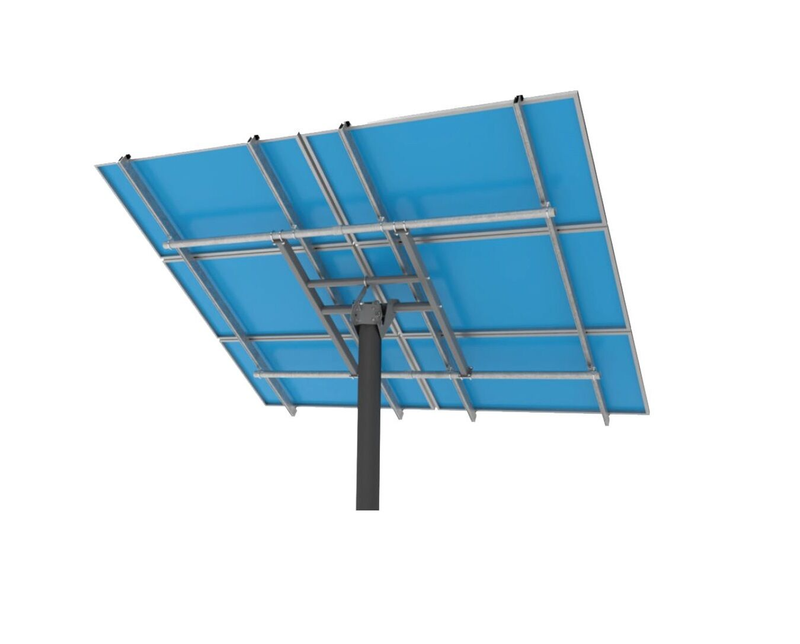
In harsh blizzard corridors (such as the Upper Midwest, Colorado Rockies, and Maine) or coastal gale zones, standard ground mounts risk being submerged beneath heavy 4-foot snowdrifts. The Tamarack Solar Pipe Mount is built specifically for structural invulnerability.
The Tamarack architecture utilizes locally sourced 2-inch or 3-inch Schedule 40 steel pipe embedded deep in concrete piers. Tamarack’s heavy-duty aluminum rail brackets clamp securely onto the horizontal steel pipe crossbars, suspending solar modules 3 to 5 feet above the ground.
This generous clearance prevents winter snow buildup from covering lower solar cells, and the continuous tilt adjustability (0° flat to 60° vertical) allows homeowners to pitch the panels steeply in winter so accumulated snow sheds immediately under gravity.
- ✓ Certified for severe 160 MPH windstorms and 60 PSF blizzard snowpack
- ✓ 3 to 5 feet of ground clearance elevates panels well above deep snow drifts
- ✓ Continuous 0°–60° tilt adjustment optimizes winter vs. summer yield
- ✓ Expansive open underside maximizes rear albedo reflection for bifacial panels
- • Higher total project investment (Schedule 40 pipe purchased separately)
- • Requires deep post-hole excavation below regional frost lines
Ideal for: Blizzard belts, mountain properties & high-wind coastal installations
Check Price on Amazon →
Chiko Solar GroundFlex
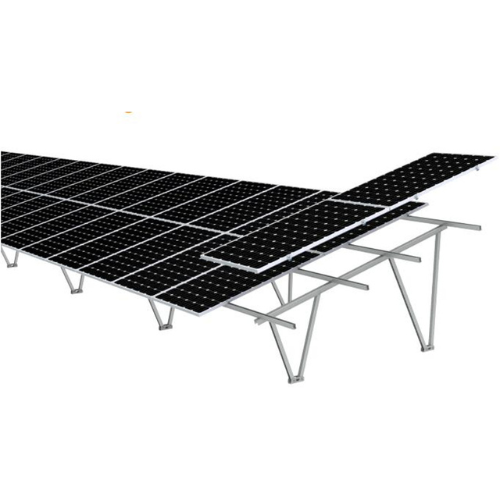
The Chiko Solar GroundFlex is engineered for homesteaders and rural solar operators building medium-to-large multi-row arrays. Its pre-assembled A-frame leg assemblies unfold rapidly on site, dramatically slashing labor hours compared to traditional bare rail kits.
The system excels when paired with galvanized helical earth screws. By driving ground screws with a hydraulic driver or high-torque powerhead, an entire 12kW array foundation can be anchored in under three hours with zero concrete mixing or excavation spoils.
Featuring precision-machined beam splices and adjustable tilt brackets (20° to 35°), the GroundFlex maintains an elevated 30-inch ground clearance that accommodates high-efficiency bifacial solar modules effortlessly.
- ✓ Pre-assembled folding A-frames reduce on-site installation time by 40%
- ✓ Native flange integration with standard helical ground screws
- ✓ High-grade AL6005-T5 anodized aluminum resists atmospheric corrosion
- ✓ Generous 30-inch clearance supports bifacial albedo light absorption
- • Requires specialized drive tool or hydraulic auger for ground screw driving
- • Snow load capacity (40 PSF) is slightly lower than heavy pipe-mount systems
Ideal for: Multi-row agricultural arrays, ground screw installations & rapid builds
Check Price on Amazon →
Foundation Engineering: Choosing Between Concrete, Screws & Ballast
The longevity of any ground-mounted photovoltaic system is dictated by its soil interaction. The table below outlines how to match your ground mount foundation to your specific terrain:
1. Concrete Sonotube Piers
Traditional 8” to 12” cardboard sonotubes augered below your regional frost line (36” to 54”) and filled with 3000 PSI concrete.
Best For: Standard clay/loam soils, permanent residential setups, maximum uplift resistance.
2. Helical Earth Ground Screws
Hot-dipped galvanized steel screws (48” to 65” long) driven into the earth using a hydraulic drive motor or manual torque wrench.
Best For: Fast single-day installs, freezing soils, rocky dirt where mixing concrete is impractical.
3. Surface Ballast Tubs
Heavy-duty polymer or pre-cast concrete ballast blocks placed directly on leveled grade and filled with gravel.
Best For: Solid bedrock, EPA brownfields, rental properties, and temporary homestead setups.
Maximizing Bifacial Solar Gains on Ground Mounts
If you are pairing your ground mount with modern Bifacial N-Type TOPCon or Heterojunction (HJT) solar panels, racking geometry directly determines your rear-side power output.
To harvest an extra 15% to 22% free energy from ground albedo reflection:
- Maintain Minimum Elevation: The lowest edge of the solar panels should be suspended at least 24 to 36 inches above the soil surface. Mounting lower than 18 inches causes self-shading on the bottom row of rear cells.
- Optimize Surface Albedo: Bare black topsoil reflects less than 10% of light (0.10 albedo). Spreading a base of light-colored crushed gravel, white agricultural tarp, or shell stone elevates ground albedo to 0.45–0.65, unlocking massive rear-side boost.
- Minimize Structural Obstructions: Select racking rails that run along the outer panel perimeter or feature narrow profile brackets so metal rails do not cast heavy horizontal shadow lines across rear photovoltaic cells.
Buyer Scenarios: Which Ground Mount Should You Select?
Scenario A: The Cost-Conscious DIY Off-Grid Homesteader
Recommendation: EG4 BrightMount System. Offers the ideal intersection of price-per-panel ($55 to $75) and structural rigidity. Modular sections allow you to start with 8 panels and expand to 24 modules later as energy storage demands grow.
Scenario B: Rocky Soil, Bedrock, or Rental Property
Recommendation: PowerField PowerRack. When augering 4-foot post holes will break shear pins on your tractor or hit solid granite 12 inches down, PowerField’s no-dig ballast tubs save thousands of dollars in commercial drilling fees.
Scenario C: Harsh Winter Snow Country & Mountain Locations
Recommendation: Tamarack Solar 4-Rail Pipe Mount. High ground elevation prevents heavy snowfall from burying lower panel rows, while the steep 45°–60° winter tilt angle allows heavy snow loads to slide off cleanly under gravitational weight.
Frequently Asked Questions (FAQ)
Do I need a permit to install a ground mount solar array?
In most jurisdictions within North America and Europe, ground-mounted photovoltaic systems require building and electrical permits. Because ground mounts represent an accessory structure, local zoning boards enforce property setback distances (typically 10 to 30 feet from property boundaries). Always check local building codes prior to augering foundation footings.
Are ground mounts more efficient than roof-mounted solar panels?
Yes. Ground-mounted arrays typically produce 10% to 25% more annual kilowatt-hours than comparable roof systems. This gain stems from three factors: precise azimuth orientation toward true solar south, the ability to adjust tilt angles for seasonal solar altitudes, and superior underside ventilation that keeps cell temperatures cooler (averting thermal efficiency derating).
What tilt angle should I set for my ground mount?
As a baseline rule of thumb, set your fixed ground mount tilt angle equal to your geographical latitude minus 10° for optimal summer harvesting, or latitude plus 15° for winter power optimization. If you plan to leave your ground mount at a single fixed angle year-round, set it equal to your local latitude.
How do I protect ground-mounted solar wiring from rodents and weather?
Direct-current (DC) string cables must be protected inside heavy-duty Schedule 40 or Schedule 80 PVC conduit or liquid-tight flexible metal conduit (LFMC). Never leave loose PV wire hanging beneath ground mounts where rodents, rabbits, or livestock can chew into high-voltage DC insulation. Use stainless steel wire clips to secure all conductors tightly along the interior rail channels.
Ready to Engineer Your Ground Mount Solar Array?
Compare verified prices, structural engineering documentation, and wind certification kits across top manufacturers before beginning your build.
Explore Certified Solar Ground Mount Hardware →