When homeowners and off-grid builders plan a photovoltaic system, their initial instinct is almost always to mount solar panels on the roof of the house.
However, residential roofs impose severe engineering compromises:
- Roof pitches rarely match your latitude’s optimal solar tilt angle.
- Shading from mature trees, gables, and plumbing vent stacks forces irregular string configurations.
- Roof-mounted panels trap heat between shingles and glass, suffering 8% to 12% thermal efficiency loss during hot summer afternoons.
- When shingles eventually require replacement after 15 to 20 years, homeowners must spend $3,000 to $6,000 in labor costs simply to uninstall and reinstall the solar array.
If you have open yard space, an acreage parcel, or an off-grid homestead, ground mount solar racking eliminates every single one of these limitations.
This engineering guide examines the major foundation types (concrete piers, helical ground screws, and ballasted racks), details NEC 300.5 trenching rules, and explains how ground mounting unlocks the full potential of bifacial solar albedo gains.
Where represents cooler cell operating temperatures due to 360-degree ambient convection airflow, represents true south alignment and seasonal tilt adjustment, and represents rear-side albedo reflection.
Ground Mount Racking Systems Compared For a direct structural face-off between ballast tub and earth-anchor systems, see our showdown of PowerRack vs. IntegraRack Ground Mounts. You can also evaluate the top residential systems in our Best Solar Panel Ground Mounts Guide.
The primary engineering challenge of a ground-mounted photovoltaic array is securing the racking against aerodynamic wind uplift and frost heave:
| Racking Foundation Type | Excavation / Installation Method | Wind Uplift Resistance | DIY Friendliness | Typical Application |
|---|---|---|---|---|
| Ballasted Ground Racks (EG4 BrightMount) | Zero digging: held by concrete pavers or gravel tubs | Up to 110 mph (with rated ballast weight) | 100% DIY (No concrete trucks or machinery) | Rocky soil, flat terrain, off-grid cabins, seasonal arrays |
| Concrete Pier Post Mounts | Drill 8–12” auger holes (4–6 ft deep) & pour Sonotubes | 140+ mph (Hurricane rated) | Moderate (Requires auger & mixing concrete) | Permitted residential solar, high-wind zones, clay/sandy soil |
| Driven Helical Ground Screws | Machine-torqued steel earth screws (5–7 ft long) | 150+ mph (Maximum uplift resistance) | Difficult (Requires hydraulic drive equipment) | Commercial solar farms, uneven slopes, expansive frost zones |
| Pole Mounts (Top-of-Pole Racks) | Single heavy steel schedule 40 pipe (6–8” OD) in massive footing | 120+ mph | Moderate (Heavy steel handling) | Snow-heavy regions, single-axis manual or dual-axis tracking |
Unlocking Bifacial Solar Yield via Albedo Reflection
One of the greatest financial arguments for ground mounting is compatibility with Tier-1 Bifacial Solar Panels (such as 400W+ glass-on-glass monocrystalline panels).
- On a Rooftop: Bifacial panels are essentially useless because the rear glass face sits 4 to 6 inches above dark asphalt shingles, where virtually zero ambient light reaches the backside.
- On a Ground Mount: Elevated 24 to 36 inches off the ground, the rear face captures diffuse sunlight reflected from the ground surface (albedo).
| Ground Cover Material | Surface Albedo Coefficient (α) | Rear-Side Bifacial Energy Gain |
|---|---|---|
| Fresh White Snow Cover | 0.75 – 0.90 (75% to 90% reflection) | +20% to +30% Extra Output |
| White Limestone / Crushed Quartz Gravel | 0.50 – 0.65 | +15% to +22% Extra Output |
| Light Dry Sand or Dry Clay Soil | 0.30 – 0.40 | +8% to +12% Extra Output |
| Green Mowed Grass / Clover Field | 0.18 – 0.25 | +5% to +8% Extra Output |
Pro Installer Tip: Laying down commercial woven landscape fabric covered by 2 inches of white crushed limestone rock under your ground array completely suppresses weed growth while permanently boosting solar electricity yield by up to 22%.
Underground Conduit Trenching: NEC 300.5 Compliance
Transporting high-voltage DC power from your ground-mounted solar array to your home inverter requires underground trenching.
To comply with National Electrical Code (NEC) 300.5, trench depths must satisfy strict minimum cover standards based on wiring method:
- Direct Burial Cable (Type UF-B): Requires a minimum burial depth of 24 inches (600 mm).
- Nonmetallic Conduit (Schedule 40 or Schedule 80 Rigid PVC): Requires a minimum burial depth of 18 inches (450 mm).
- Intermediate or Rigid Metal Conduit (IMC / RMC): Requires a minimum burial depth of 6 inches (150 mm).
Best Practice Underground Conduit Rules:
- Always Use Schedule 80 PVC Where Exposed: Use heavy-wall Schedule 80 PVC conduit wherever the pipe emerges from the earth and runs up the racking legs or building foundation to protect against lawnmower and weed trimmer physical damage.
- Install a Continuous Red Warning Tape: Place yellow or red underground electrical warning ribbon in the trench approximately 12 inches above the conduit. If someone digs in the yard years later, their shovel strikes the warning tape before cutting into high-voltage DC conductors.
- Upsize Conduit by One Size: Pulling heavy 8 AWG or 6 AWG copper solar wire through a 3/4-inch conduit over 100 feet creates high friction. Installing 1-inch or 1.25-inch Schedule 40 PVC ensures easy wire pulling and provides expansion capacity for future strings.
Seasonal Tilt Adjustment Optimization If your layout requires precision seasonal tilt adjustment without heavy tools, read our hands-on Maple Leaf Goose Mount Review, and calculate your exact seasonal degrees with our Optimal Solar Panel Tilt Angle Guide.
Unlike fixed rooftop solar panels that are locked at the roof’s slope (typically 18° to 26°), most ground-mounted racking systems feature adjustable tilt pivot brackets.
Adjusting panel tilt just twice per year increases total annual energy harvest by 8% to 12%:
- Summer Setting (March 15 to September 15): For a homeowner at 40°N latitude (e.g., Denver, Indianapolis, Philadelphia), set panels to 25° tilt. This captures high midday sun while maintaining sufficient slope for rainwater runoff.
- Winter Setting (September 15 to March 15): At 40°N latitude, increase tilt to 55°. This steep angle directly faces low-hanging winter sun and causes heavy snowfall to slide off the slick glass surface automatically.
Recommended Ground Mount Racking Systems
For DIY builders and professional installers, these ground racking solutions deliver the best combination of structural strength and ease of assembly:
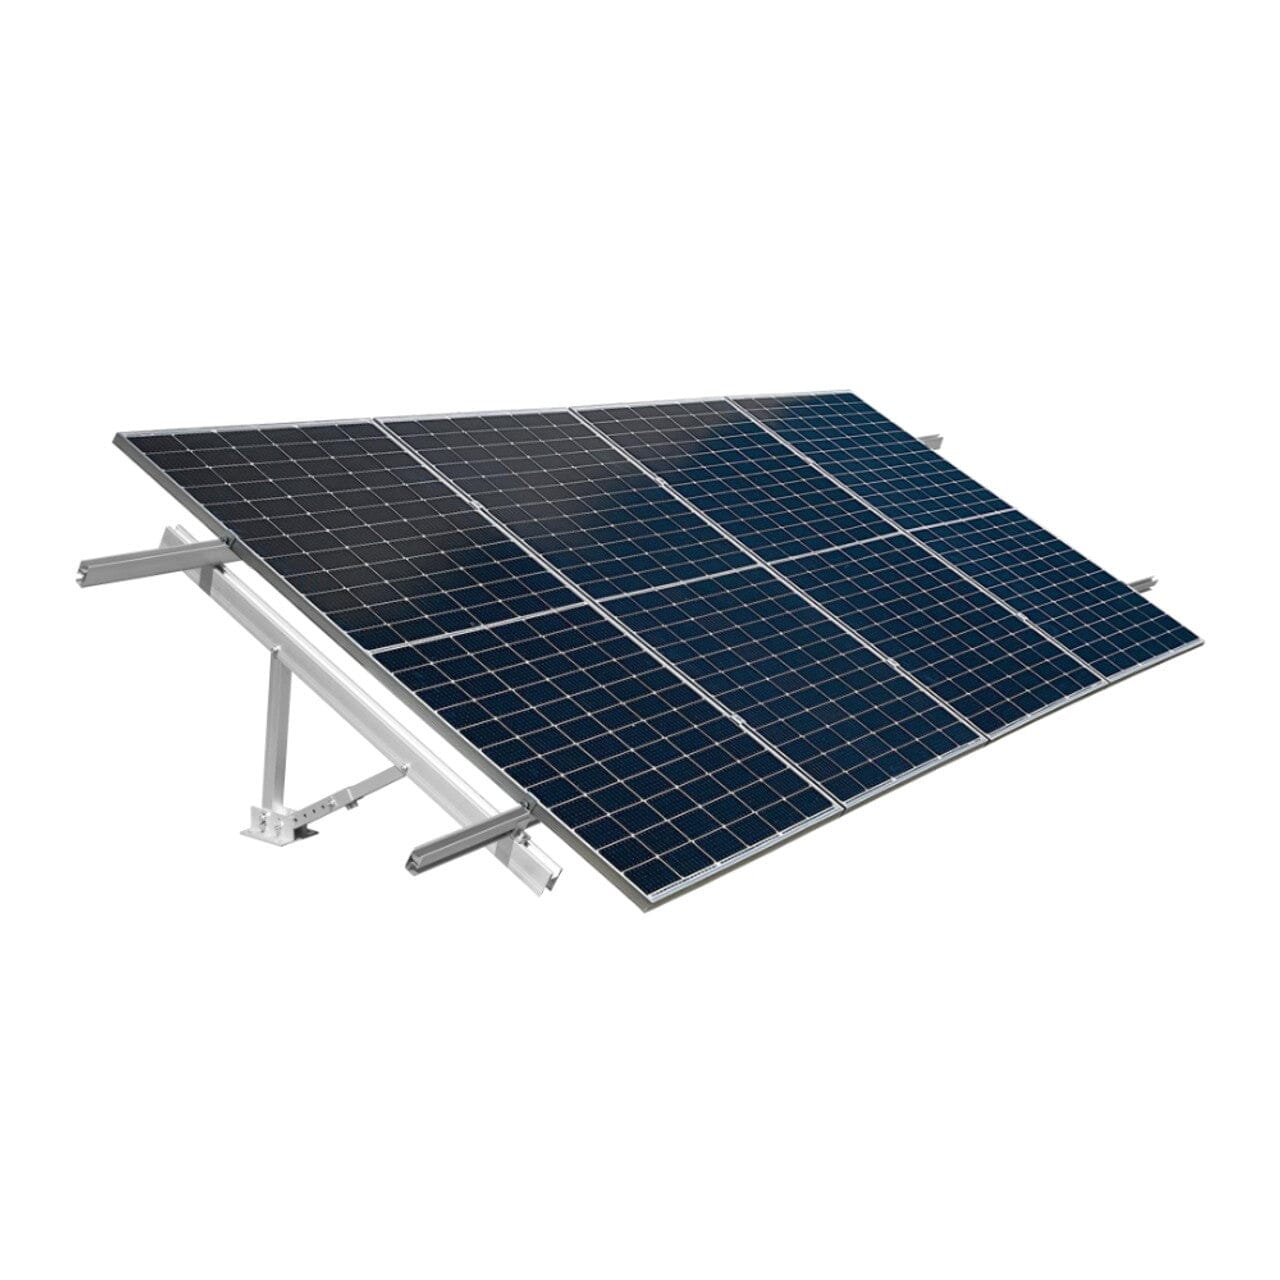
EG4 BrightMount Ground Mount (4-Panel Unit)
Engineered for rapid no-dig installation using standard concrete pavers or ground anchors. Built from structural-grade corrosion-resistant aluminum alloy with adjustable 20° to 35° tilt angles. Modular design connects seamlessly in long rows.
- • Capacity: 4 large solar panels (up to 450W+ each)
- • Wind Rating: Rated up to 105 mph with proper ballast
- • Material: High-strength anodized 6005-T5 aluminum
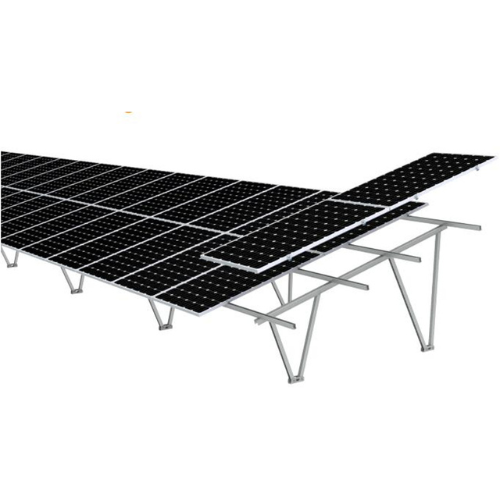
Chiko Solar GroundFlex Mount System
Designed for heavy commercial and off-grid homestead arrays requiring concrete pier or helical screw foundations. Features pre-assembled A-frames that cut installation time in half while providing 140+ mph wind certification.
- • Foundation: Supports concrete piers, ground screws, or piles
- • Wind / Snow Rating: 140 mph wind / 50 psf snow load
- • Scalability: Unlimited string length expansion
Ground Mount Installation Checklist
- Dial 811 Before You Dig: Always call the national 811 “Call Before You Dig” service at least 72 hours before breaking ground to mark buried gas, electrical, water, and telecom lines.
- Verify Frost Line Depth: In freezing northern climates, concrete pier footings must extend at least 6 to 12 inches below the local frost line (typically 36 to 48 inches deep) to prevent winter frost heaving from twisting the racking.
- Drive a Dedicated Ground Rod: Per NEC 250.32 and NEC 690.47, ground-mounted solar arrays detached from the main residence require their own 8-foot copper ground rod driven directly into the earth at the array location and bonded to the racking frame with 6 AWG bare copper wire.
- Protect Wire Runs from Rodents: Ground squirrels, mice, and rabbits love chewing on cross-linked polyethylene (XLPO) solar wire insulation. Enclose all exposed wire transitions between panels and junction boxes inside flexible liquid-tight metal conduit (LFMC).
Frequently Asked Questions
Is ground mount solar more expensive than roof mount?
Yes, ground mount solar typically costs 15% to 25% more in upfront installation costs than rooftop solar due to trenching labor, PVC conduit, racking hardware, and concrete foundation footings. However, ground arrays frequently produce 20% to 30% more total energy annually through optimal tilt angles, cooler operating temperatures, and bifacial albedo gain—recovering the extra cost over 5 to 7 years.
Do I need a permit to install ground mount solar panels?
In most jurisdictions, yes. Building departments require a building permit (to verify foundation engineering against local wind and snow loads) and an electrical permit (to inspect conduit trench depth, wire gauge ampacity, and disconnect switches). Always check local zoning setbacks, as some townships restrict solar panels within 10 to 25 feet of property lines.
How deep should I bury solar wire from a ground mount?
Per NEC 300.5, rigid nonmetallic PVC conduit (Schedule 40 or Schedule 80) must be buried at a minimum depth of 18 inches (450 mm) from the top of the conduit to the finished ground surface. If using direct-burial UF cable, the required trench depth is 24 inches (600 mm).
Can ground mount solar withstand severe hurricane winds?
Yes. When properly engineered with concrete piers or helical ground screws, heavy-duty commercial ground mount racking systems like Chiko or IronRidge are certified to withstand winds exceeding 130 to 150 mph. Ensure all module mounting bolts are torqued to manufacturer specifications using thread-locking compound.